复习

JavaWeb软件大作业

在这里插入图片描述

如果有人需要源码研究一下,在这个博客最下方有一个实现基本的学生的增删改查的项目(其实就是我的1.0版本….)。

关于这个应用软件大作业我也头好疼。。。还有一个月,要一个人搞一个项目。。。难搞难搞。。。给大家介绍一下我准备做的项目吧。我准备做一个学生信息管理系统的后台管理,看博客的兄弟可不要和我做的一模一样哦。。。当然我做的是最基础的Javaweb项目,做的可能不是太厉害。像旭光这个大佬就别看了。。。

技术要求

后台主界面使用AdminLTE开发。

技术选型采用:JSP+Servlet

数据库采用MySql(说明:我下面使用的数据库是mysql5.7的哦,8.几版本的有些地方不一样,不过不要担心我会在下面提及,当然你好好看了才行),数据库连接池采用druid,数据库工具采用JDBCTemplate

maven(不会使用maven也行)

环境搭建

关于环境搭建,可能大多数同学应该不知道什么是maven。所以就先按照引入lib包来先搭建一个开发环境。

1.创建一个JavaWeb项目

我感觉这一步就有同学应该不会。。。。

image-20201122131557231

image-20201122131612904

image-20201122131701197

image-20201122131748786

image-20201122131821584

image-20201122131849204

image-20201122131953503

2.添加jar包

image-20201129184913671

image-20201129184941725

image-20201129184956024

image-20201129185020716

image-20201129185038419

3.创建开发目录结构

这个。。。创建包大家应该都会创建吧。。。

<1>现在src下创建包结构

image-20201122133550446

<2>创建resources、Test

注意:这个是需要在项目下创建

image-20201122133736640

然后看下面操作

image-20201122133839689

image-20201122133908524

image-20201122133933542

好,现在应该有人有疑惑了,为啥我要创建这两个包?resources包是用来干啥的?其实resource包主要是用来放置配置文件的。Test包呢?这个包主要用于进行测试代码的。

4.添加Tomcat运行环境

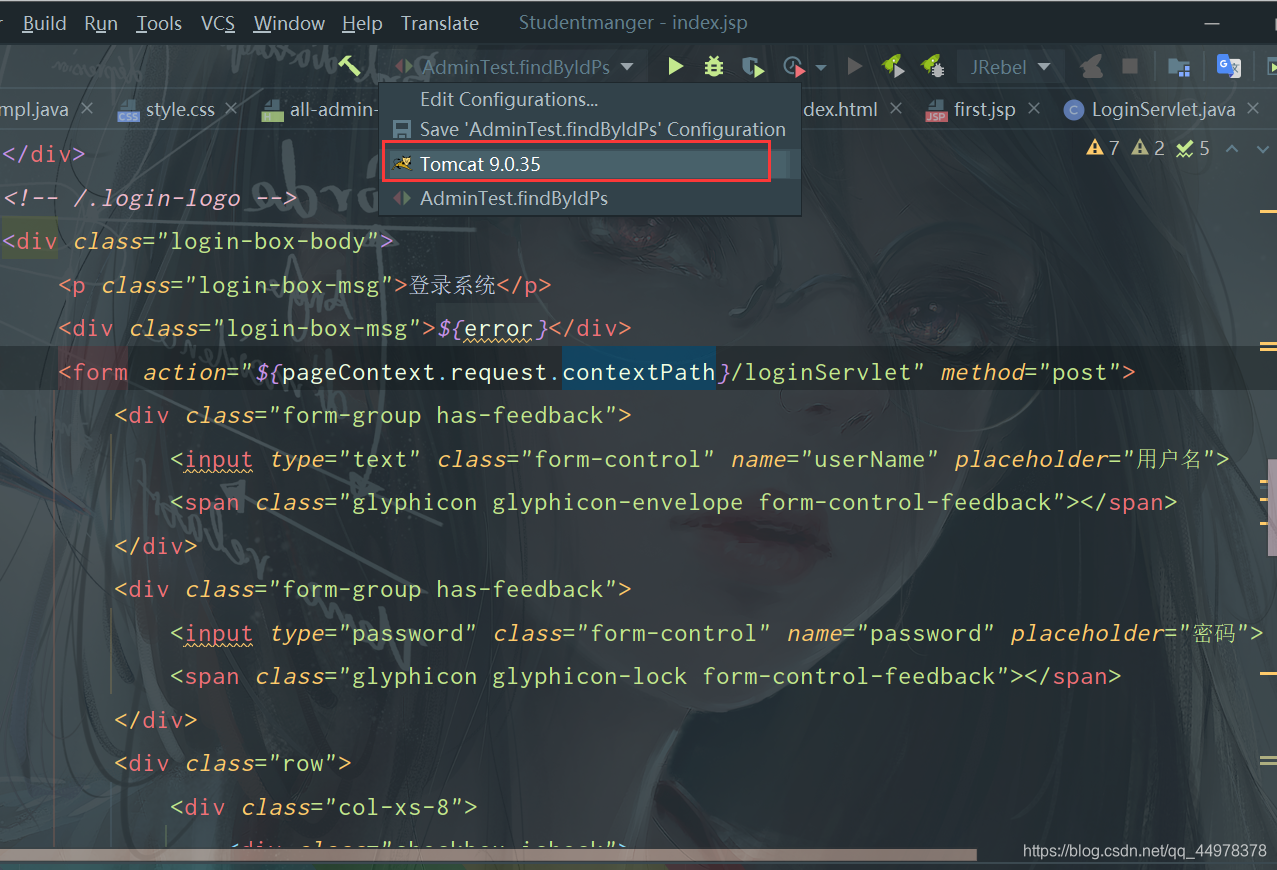
image-20201122134348173

image-20201122134450147

image-20201122134508395

自此环境就搭建完毕了

5.如果是使用maven的请看maven如何搭建环境,如果不知道maven是啥的就不用看。

image-20201122134747029

要是你本地的Maven,不要用IDEA自带的Maven

image-20201122134806344

然后finish即可,创建包结构和上面一致

需求分析

需要实体类对象

系统管理员:admin

学生:student

教师:teacher

课程:class

选课:course

等等

image-20201122135338481

实现功能

1.登录注册功能

主要实现系统管理员、学生、教师这三种用户类型都能够登录,并且可以区分出是哪一种用户类型。

2.学生信息增删改查

主要实现学生信息的增加、删除、修改功能,把学生信息列表给展现出来

3.教师信息增删改查

主要实现教师信息的增加、删除、修改功能,把教师信息列表给展现出来

4.课程信息的增删改查

主要实现课程信息的增加、删除、修改功能,把课程信息列表给展现出来

5.选课信息的增删改查

主要实现多表查询

等等

实现登录功能

首先先展示我的登录功能
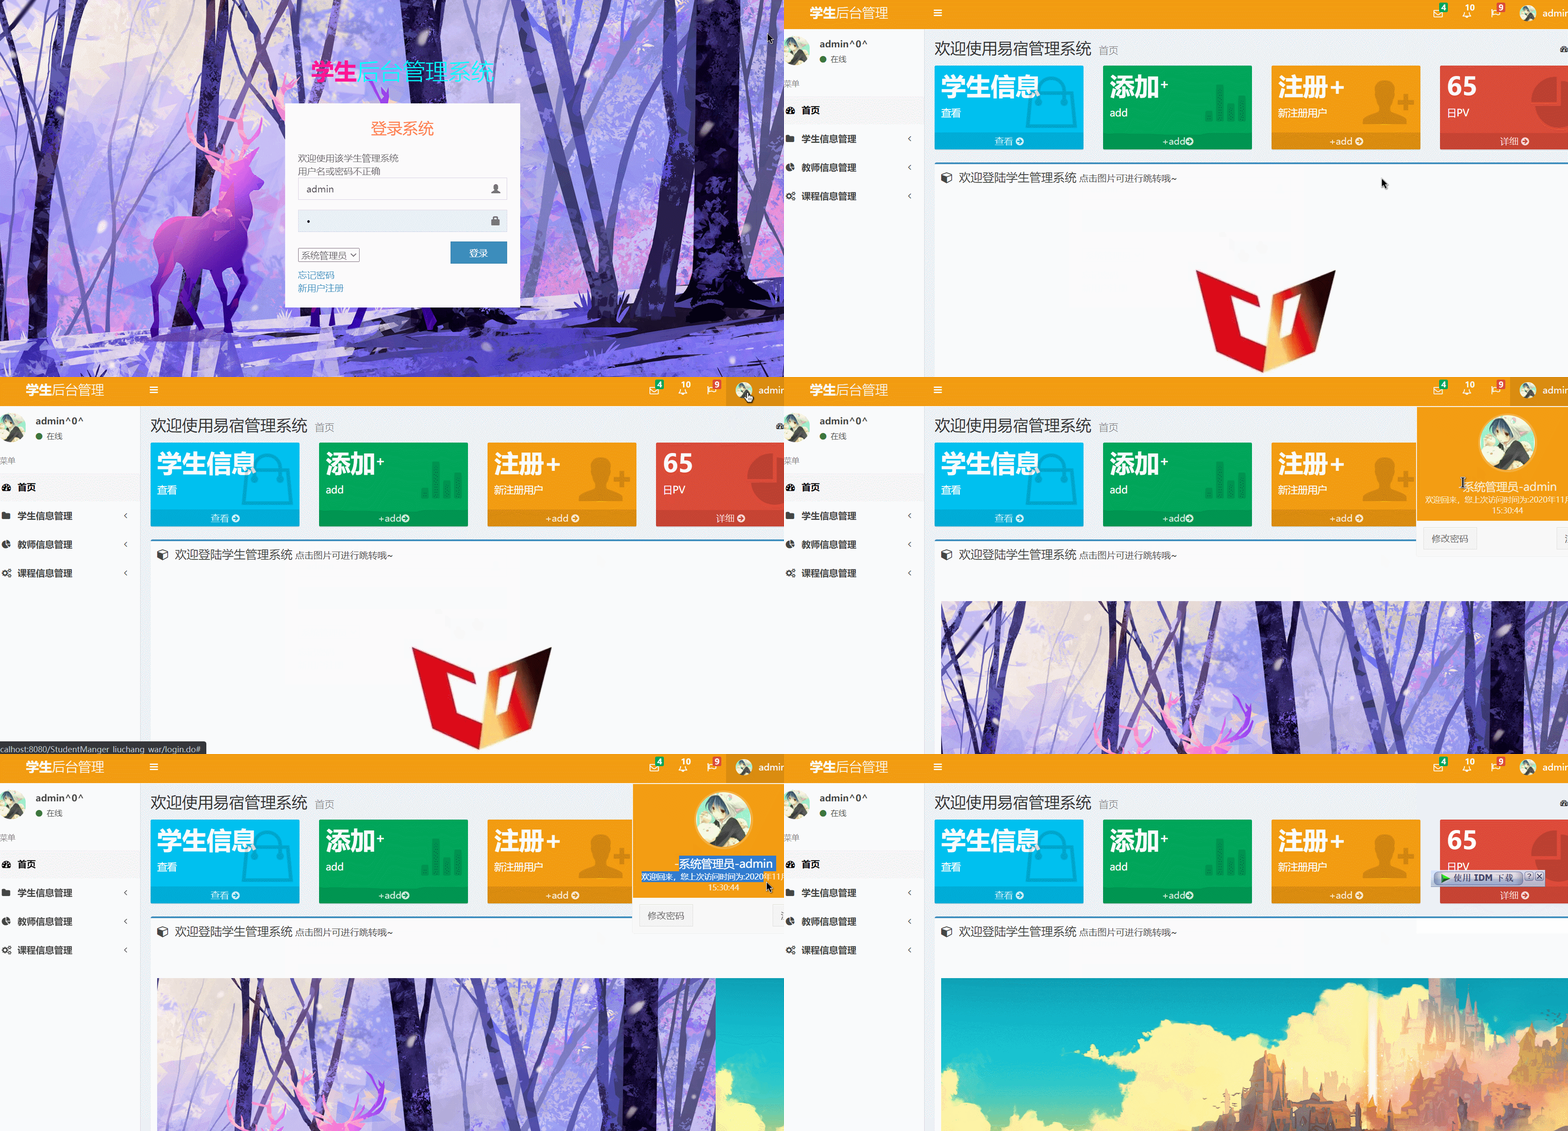
在这里插入图片描述

可以发现我的登录功能是可以选择是哪一个用户类型的,以及可以获得登录的用户名和登录的时间。

不过下面我只会介绍一种用户类型的登录

需要的技术

1.会使用jsp/servlet

2.会使用cookice

3.mysql

4.JdbcTemplate

首先导入工具类以及jdbc.properties

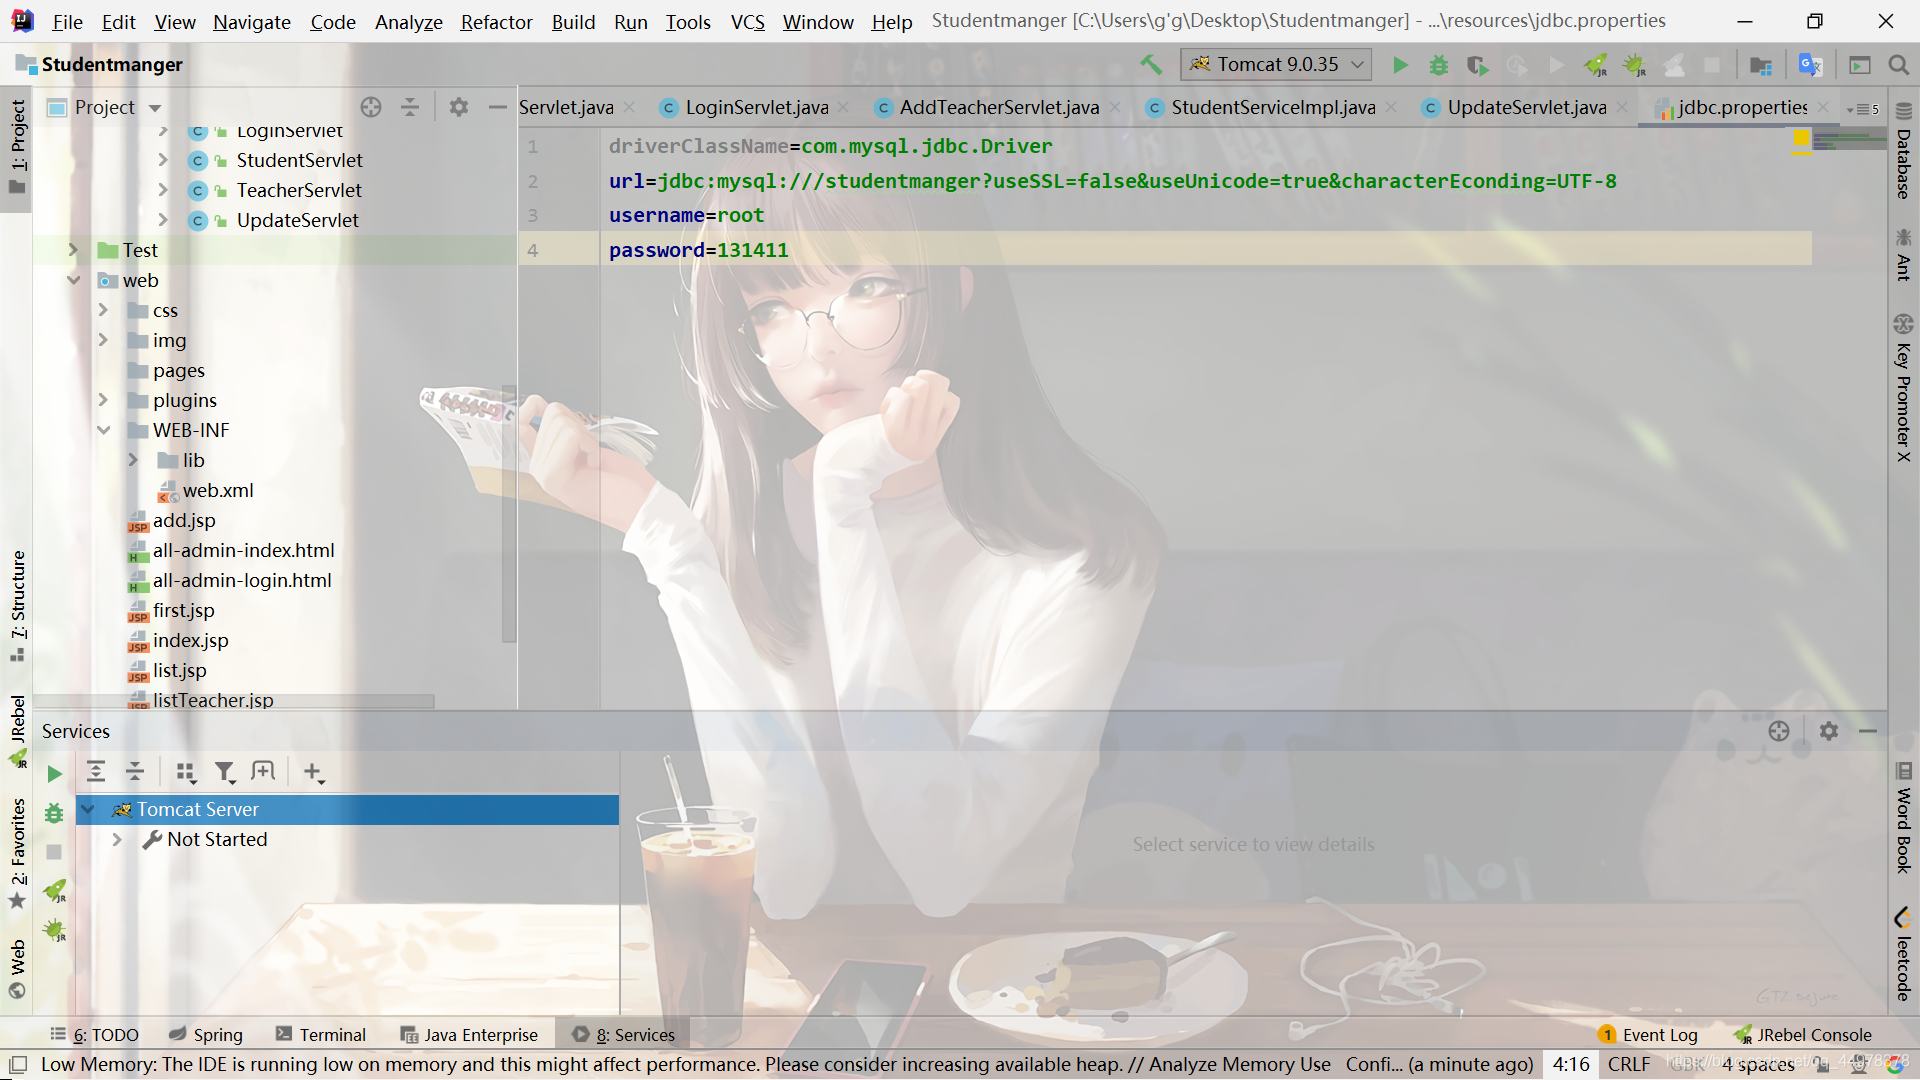
<1>在resource目录下创建jdbc.properties文件

image-20201122155529839

注意:我的数据库是mysql5.7的!!!要是mysql8.0版本以上的可不是这样哦~

1
2
3
4
driverClassName=com.mysql.jdbc.Driver
url=jdbc:mysql:///db_student?useSSL=false&useUnicode=true&characterEconding=UTF-8
username=root
password=131411

<2>在utils包下创建JDBCUtils类

image-20201122155553146

1
2
3
4
5
6
7
8
9
10
11
12
13
14
15
16
17
18
19
20
21
22
23
24
25
26
27
28
29
30
31
32
33
34
35
36
37
38
39
40
41
42
43
44
45
46
47
48
49
50
51
52
53
54
55
56
57
58
59
60
package com.liu.utils;

import com.alibaba.druid.pool.DruidDataSourceFactory;

import javax.sql.DataSource;
import java.sql.Connection;
import java.sql.ResultSet;
import java.sql.SQLException;
import java.sql.Statement;
import java.util.Properties;

public class JDBCUtils {
private static DataSource ds;
static {
try {
Properties properties=new Properties();
properties.load(JDBCUtils.class.getClassLoader().getResourceAsStream("jdbc.properties"));
ds= DruidDataSourceFactory.createDataSource(properties);
} catch (Exception e) {
e.printStackTrace();
}
}

//获取连接池方法
public static DataSource getDataSource(){
return ds;
}
//获取连接方法
public static Connection getConnection() throws SQLException {
return ds.getConnection();
}
//释放资源
public static void close(Statement statement, Connection connection){
close(null,statement,connection);
}
public static void close(ResultSet resultSet, Statement statement, Connection connection){
if (resultSet!=null){
try {
resultSet.close();
} catch (SQLException e) {
e.printStackTrace();
}
}
if (statement!=null){
try {
statement.close();
} catch (SQLException e) {
e.printStackTrace();
}
}
if (connection!=null){
try {
statement.close();//归还
} catch (SQLException e) {
e.printStackTrace();
}
}
}

}

Dao层的实现

首先说明一下:我的数据库中有一个s_admin表,关于数据库自己建哦。

<一>在pojo包下创建admin

image-20201122155136964

1
2
3
4
5
6
7
8
9
10
11
12
13
14
15
16
17
18
19
20
21
22
23
24
25
26
27
28
29
30
31
32
33
34
35
36
37
38
39
40
41
42
43
44
45
46
47
48
49
50
51
52
53
54
55
56
57
58
59
60
61
62
63
package com.liu.pojo;


import java.util.Date;

public class Admin{
private int id;
private String name;
private String password;
private Date createDate;

public Admin() {
}

public int getId() {
return id;
}

public void setId(int id) {
this.id = id;
}

public String getName() {
return name;
}

public void setName(String name) {
this.name = name;
}

public String getPassword() {
return password;
}

public void setPassword(String password) {
this.password = password;
}

public Date getCreateDate() {
return createDate;
}

public void setCreateDate(Date createDate) {
this.createDate = createDate;
}

public Admin(int id, String name, String password, Date createDate) {
this.id = id;
this.name = name;
this.password = password;
this.createDate = createDate;
}

@Override
public String toString() {
return "Admin{" +
"id=" + id +
", name='" + name + '\'' +
", password='" + password + '\'' +
", createDate='" + createDate + '\'' +
'}';
}
}

<二>在dao层目录下创建AdminDao

image-20201122155207700

1
2
3
4
5
6
7
8
9
10
11
12
13
14
15
16
17
18
19
20
21
22
23
24
25
26
27
package com.liu.dao;

import com.liu.pojo.Admin;

public interface AdminDao {
/**
* 通过名字和密码查询出来admin
* @date 2020-11-20
*/
Admin findByNameAndPassword(String name,String password);
/**
* 通过id来更改密码
* @date 2020-11-20
*/
void updateAdminByIdSetPassword(int id,String newPassword);
/**
* 通过id和password来查询admin
* @date 2020-11-20
*/
Admin findByIdAndPassword(int id,String password);
/**
* 插入一个admin数据
* @date 2020-11-20
*/
void insertAdmin(Admin admin);
}

<三>在dao层目录下创建一个Impl包,然后在Impl包下,创建AdminDao的实现类AdminDaoImpl

image-20201122155225691

这里就需要写东西与数据库进行交互了,我们通过JDBCUtils来获取连接池对象,然后查询数据库。

1
2
3
4
5
6
7
8
9
10
11
12
13
14
15
16
17
18
19
20
21
22
23
24
25
26
27
28
29
30
31
32
33
34
35
36
37
38
39
40
41
42
43
44
45
46
47
48
49
50
51
52
53
54
package com.liu.dao.Impl;

import com.liu.dao.AdminDao;
import com.liu.pojo.Admin;
import com.liu.utils.JDBCUtils;
import org.springframework.dao.DataAccessException;
import org.springframework.jdbc.core.BeanPropertyRowMapper;
import org.springframework.jdbc.core.JdbcTemplate;

public class AdminDaoImpl implements AdminDao {
private JdbcTemplate jdbcTemplate;

public AdminDaoImpl() {
jdbcTemplate=new JdbcTemplate(JDBCUtils.getDataSource());
}
/**
* 通过名字和密码查询出来admin
* @date 2020-11-20
*/
@Override
public Admin findByNameAndPassword(String name,String password) {
String sql = "select * from s_admin where name=? and password=?";
Admin admin1 = jdbcTemplate.queryForObject(sql, new BeanPropertyRowMapper<Admin>(Admin.class), name,password);
return admin1;
}
/**
* 通过id来更改密码
* @date 2020-11-20
*/
@Override
public void updateAdminByIdSetPassword(int id, String newPassword) {
String sql = "update s_admin set password = ? where id = ?";
int update = jdbcTemplate.update(sql, newPassword, id);
System.out.println("更改admin成功!!");
}
/**
* 通过id和password来查询admin
* @date 2020-11-20
*/
@Override
public Admin findByIdAndPassword(int id, String password) {
String sql = "select * from s_admin where id=? and password=?";
Admin admin = jdbcTemplate.queryForObject(sql, new BeanPropertyRowMapper<Admin>(Admin.class), id, password);
return admin;
}

@Override
public void insertAdmin(Admin admin) {
String sql="insert into s_admin(id,name,password,createDate) values (?,?,?,?)";
int update = jdbcTemplate.update(sql, admin.getId(), admin.getName(), admin.getPassword(), admin.getCreateDate());
System.out.println("插入admin成功!!");
}

}

<四>测试。在测试Test包下创建一个AdminTest类

image-20201122160057394

1
2
3
4
5
6
7
8
9
10
11
12
13
14
15
16
17
18
19
20
21
22
23
24
25
26
27
28
29
30
31
32
33
34
35
36
37
38
39
40
41
42
43
44
45
46
47
48
49
50
51
52
53
54
package com.liu.dao.Impl;

import com.liu.dao.AdminDao;
import com.liu.pojo.Admin;
import com.liu.utils.JDBCUtils;
import org.springframework.dao.DataAccessException;
import org.springframework.jdbc.core.BeanPropertyRowMapper;
import org.springframework.jdbc.core.JdbcTemplate;

public class AdminDaoImpl implements AdminDao {
private JdbcTemplate jdbcTemplate;

public AdminDaoImpl() {
jdbcTemplate=new JdbcTemplate(JDBCUtils.getDataSource());
}
/**
* 通过名字和密码查询出来admin
* @date 2020-11-20
*/
@Override
public Admin findByNameAndPassword(String name,String password) {
String sql = "select * from s_admin where name=? and password=?";
Admin admin1 = jdbcTemplate.queryForObject(sql, new BeanPropertyRowMapper<Admin>(Admin.class), name,password);
return admin1;
}
/**
* 通过id来更改密码
* @date 2020-11-20
*/
@Override
public void updateAdminByIdSetPassword(int id, String newPassword) {
String sql = "update s_admin set password = ? where id = ?";
int update = jdbcTemplate.update(sql, newPassword, id);
System.out.println("更改admin成功!!");
}
/**
* 通过id和password来查询admin
* @date 2020-11-20
*/
@Override
public Admin findByIdAndPassword(int id, String password) {
String sql = "select * from s_admin where id=? and password=?";
Admin admin = jdbcTemplate.queryForObject(sql, new BeanPropertyRowMapper<Admin>(Admin.class), id, password);
return admin;
}

@Override
public void insertAdmin(Admin admin) {
String sql="insert into s_admin(id,name,password,createDate) values (?,?,?,?)";
int update = jdbcTemplate.update(sql, admin.getId(), admin.getName(), admin.getPassword(), admin.getCreateDate());
System.out.println("插入admin成功!!");
}

}

image-20201122160238773

点击左侧运行,发现可以查出数据。说明Admin的Dao层已经实现。

接下来实现service层

service层实现的是我们的某一个业务,你要知道,一个业务可能需要多个dao层的方法来实现。所以我们需要有一个service层来实现我们的业务。(这是一个编程的思路MVC编程思想)

<一>:在service包下创建AdminService接口

现在方法只有一个:就是实现登录功能

1
2
3
4
5
6
7
8
package com.liu.service;

import com.liu.pojo.Admin;

public interface AdminService {
Admin loginAdmin(String name,String password);
}

<二>:在service包下创建一个Impl子包,在Impl包下创建一个AdminServiceImpl实现类

1
2
3
4
5
6
7
8
9
10
11
12
13
14
15
16
17
18
19
20
21
22
23
24
25
package com.liu.service.Impl;

import com.liu.dao.AdminDao;
import com.liu.dao.Impl.AdminDaoImpl;
import com.liu.pojo.Admin;
import com.liu.service.AdminService;
import org.springframework.dao.DataAccessException;

public class AdminServiceImpl implements AdminService {
private AdminDao adminDao;

public AdminServiceImpl() {
adminDao=new AdminDaoImpl();
}

@Override
public Admin loginAdmin(String name, String password) {
try {
Admin admin = adminDao.findByNameAndPassword(name, password);
return admin;
}catch (DataAccessException e){
return null;
}
}
}

image-20201122161027535

导入AdminLTE的包

1.把css img plugins 复制粘贴到web下

image-20201122161256433

先创建一个pages包,然后把AdminLTE的all-admin-login.html粘贴复制到这个pages包下,然后再移动到web下。这样可不是多此一举,IDEA有重构功能,当你移动项目里面的东西时,IDEA会自动把里面的路径给改变。
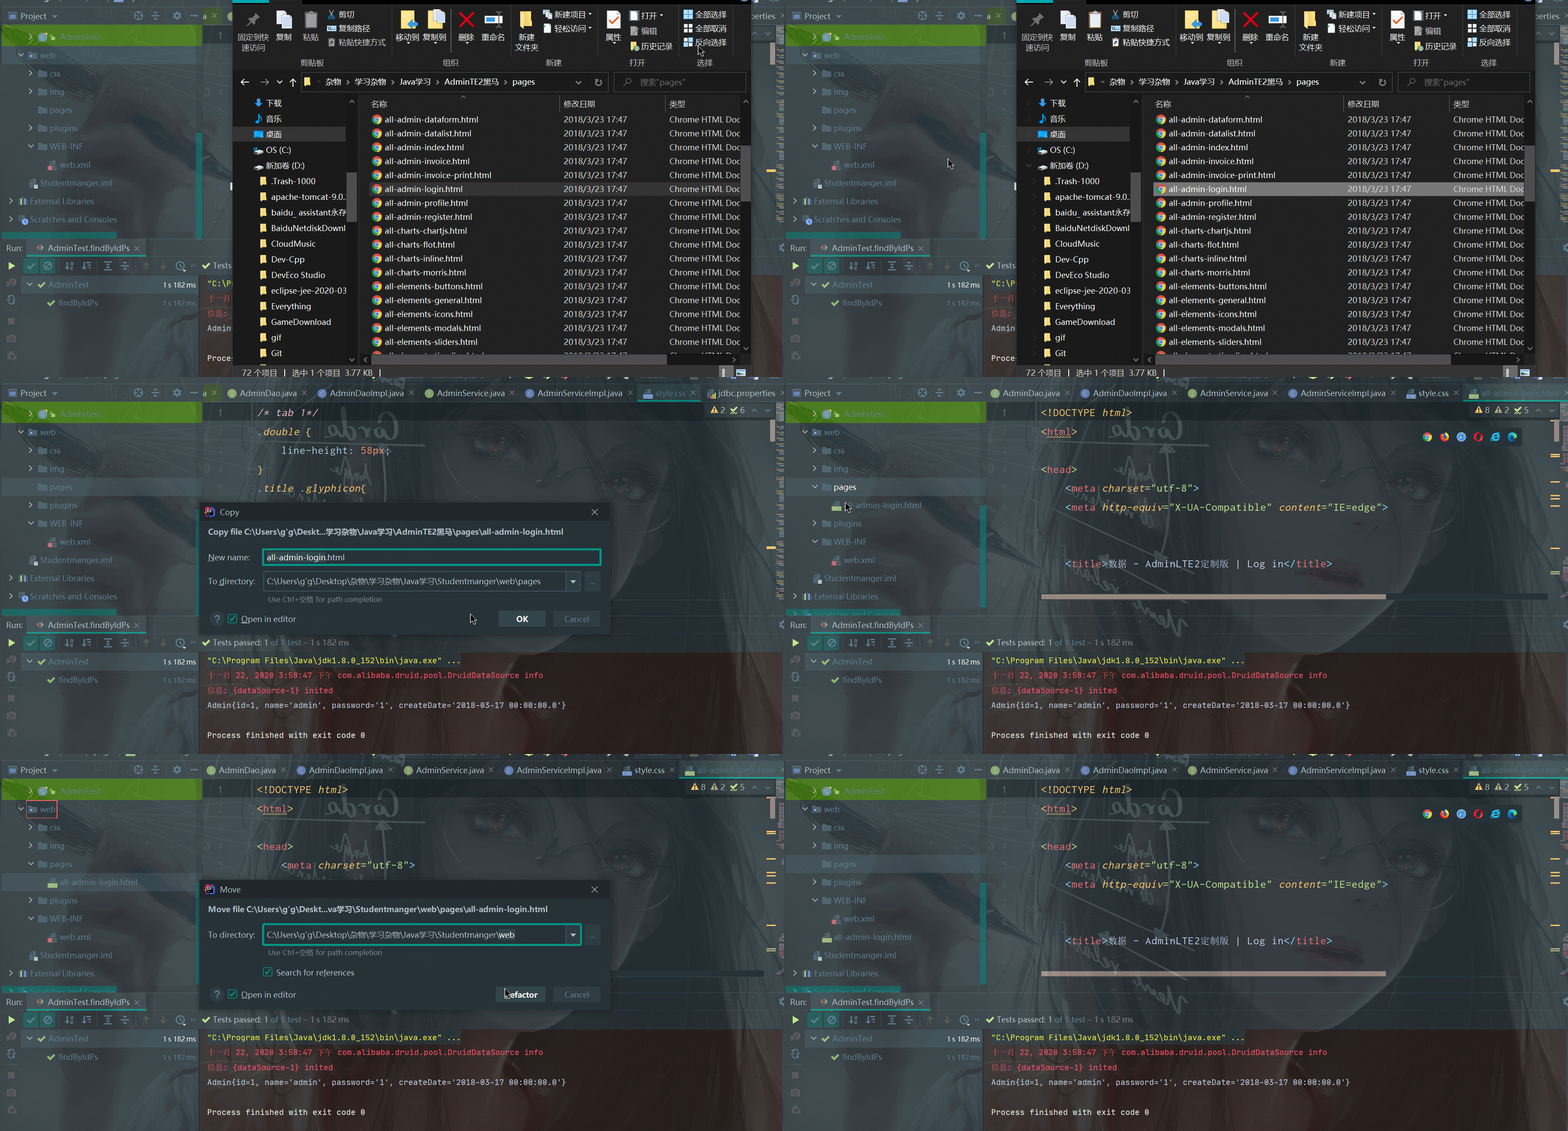
在这里插入图片描述

可以发现plugins前面的../ IDEA自动帮你去掉了。

image-20201122162433401

2.我们需要更改一下all-admin-login.html的一些东西

比如:

把这个改成text

image-20201122163653984

2.为这个input添加上name标签以及改变默认提示字

image-20201122163845351

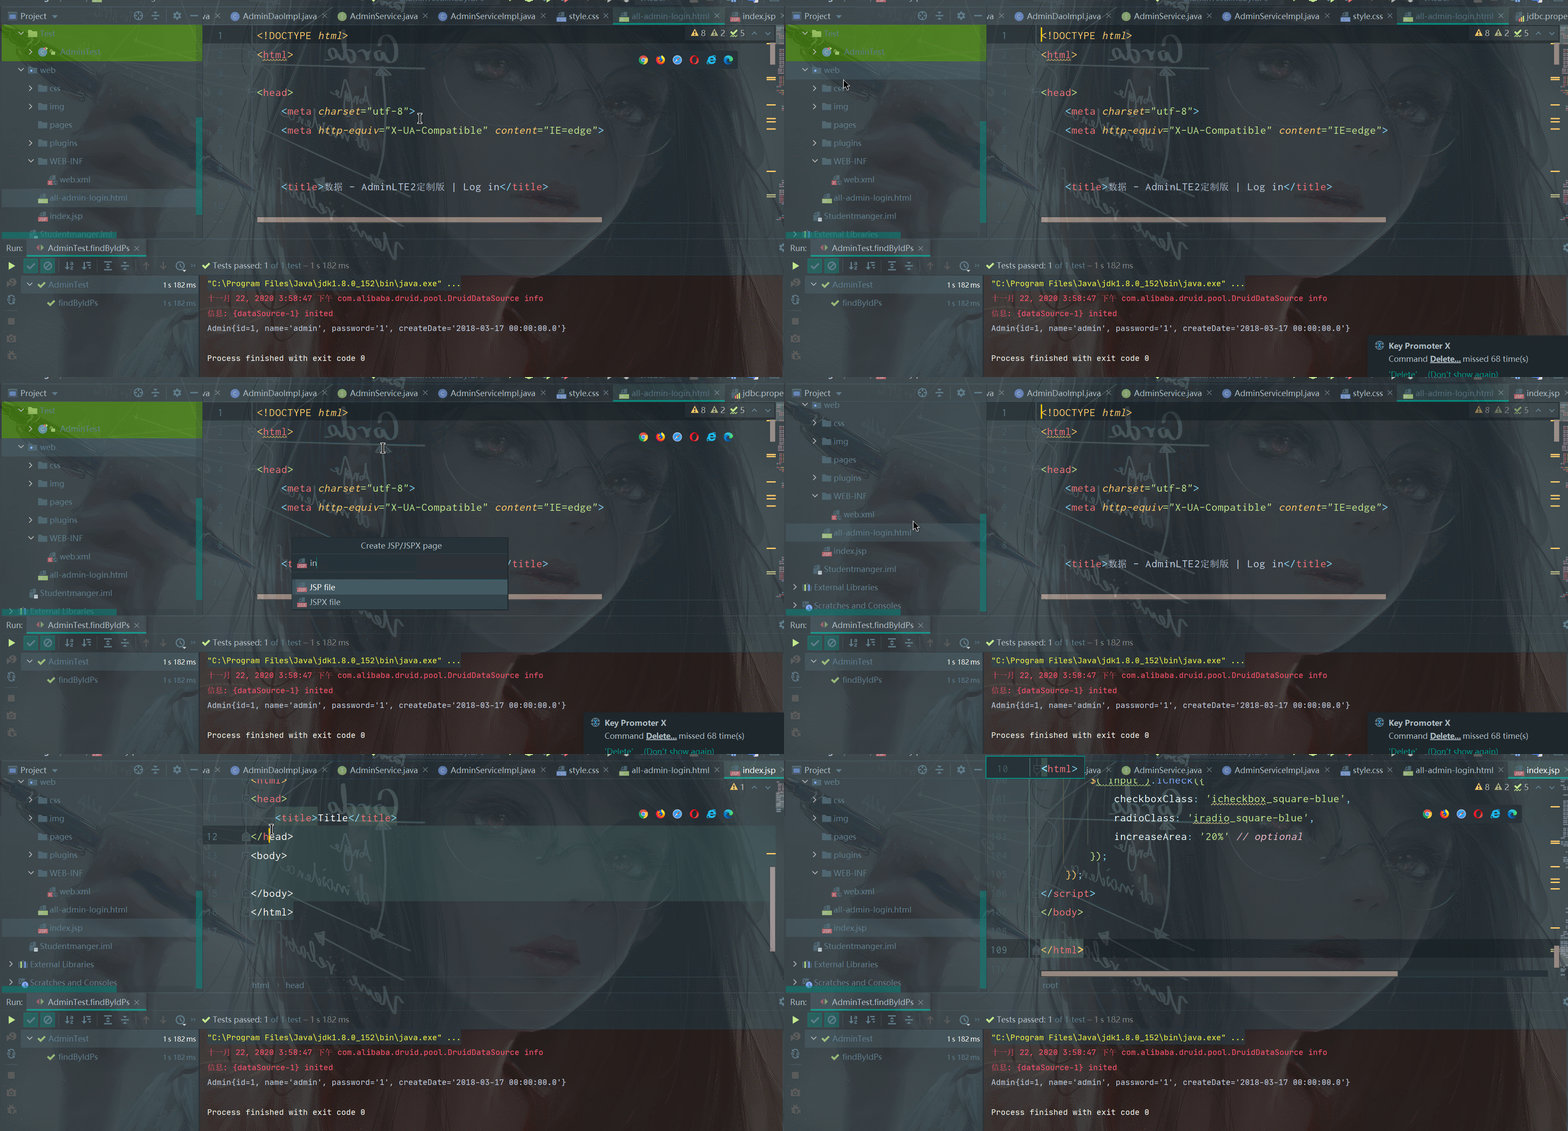
3.接下来把这个html变成jsp文件,并设置为项目启动就跑到的页面

在这里插入图片描述

注:index.jsp是Tomcat所设置的首选界面,如果不想可以修改WEB-INF下的web.xml

比如想让first.jsp为首选界面

1
2
3
4
5
6
7
8
9
10
11
12
13
14
15
16
17
<?xml version="1.0" encoding="UTF-8"?>

<web-app version="2.4" xmlns="http://java.sun.com/xml/ns/j2ee"
xmlns:xsi="http://www.w3.org/2001/XMLSchema-instance"
xsi:schemaLocation="http://java.sun.com/xml/ns/j2ee
http://java.sun.com/xml/ns/j2ee/web-app_2_4.xsd">


<welcome-file-list>
<welcome-file>first.jsp</welcome-file>
<welcome-file>default.html</welcome-file>
<welcome-file>default.htm</welcome-file>
<welcome-file>default.jsp</welcome-file>
</welcome-file-list>


</web-app>

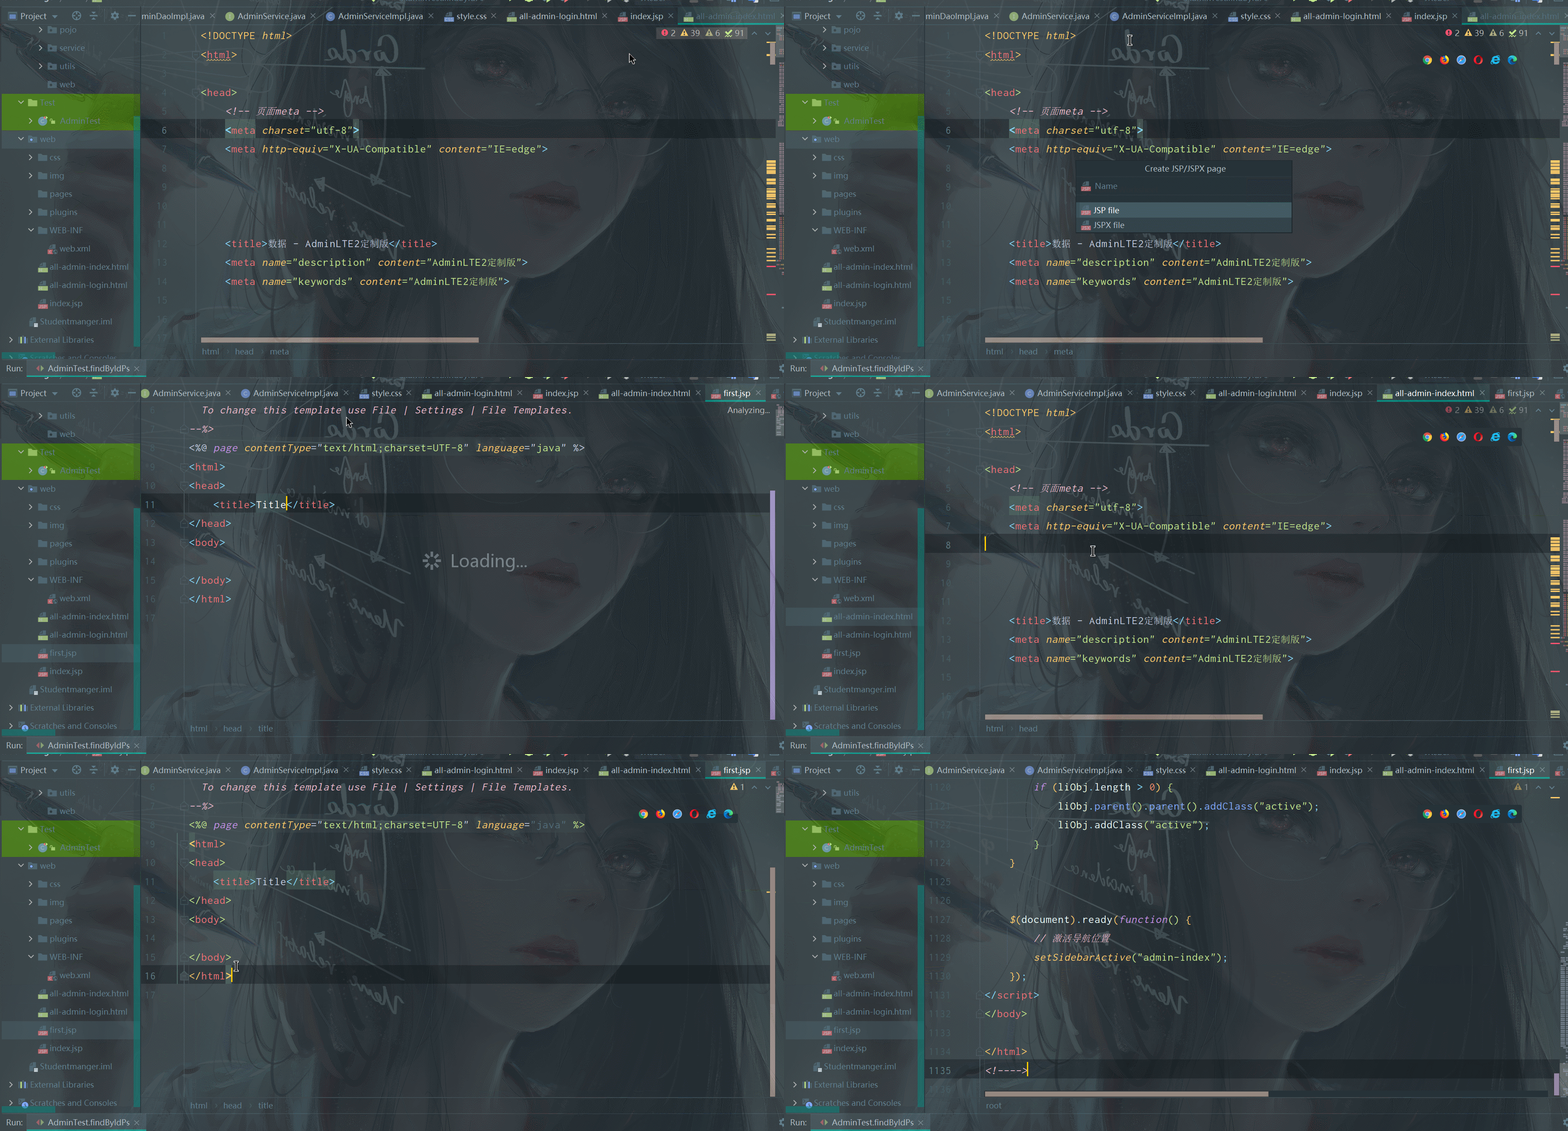
4.相同的方法导入all-admin-index.html,创建一个first.jsp,与上面一样除了first.jsp的第一行代码不变,其他全换成all-admin-index.html
在这里插入图片描述

实现web层登录功能

在web层下创建一个LoginServlet

1
2
3
4
5
6
7
8
9
10
11
12
13
14
15
16
17
18
19
20
21
22
23
24
25
26
27
28
29
30
31
32
33
34
35
36
37
38
39
40
41
42
43
44
45
46
47
48
49
50
51
52
53
54
55
56
57
58
59
60
61
62
63
64
65
66
67
68
69
70
71
72
73
74
75
76
77
78
79
80
81
82
83
84
85
86
87
88
89
90
91
92
93
94
95
96
97
98
99
100
101
102
103
104
105
106
107
108
109
110
111
112
113
114
115
116
117
package com.liu.web;

import com.liu.pojo.Admin;
import com.liu.service.AdminService;
import com.liu.service.Impl.AdminServiceImpl;

import javax.servlet.ServletContext;
import javax.servlet.ServletException;
import javax.servlet.annotation.WebServlet;
import javax.servlet.http.Cookie;
import javax.servlet.http.HttpServlet;
import javax.servlet.http.HttpServletRequest;
import javax.servlet.http.HttpServletResponse;
import java.io.IOException;
import java.io.UnsupportedEncodingException;
import java.net.URLDecoder;
import java.net.URLEncoder;
import java.text.SimpleDateFormat;
import java.util.Date;

@WebServlet("/loginServlet")
/**
* @date 2020-11-20
* 实现功能:登录功能
* 实现的要求:登录
* 并能够记录登录时间以及登录人和登录人员类型
* */
public class LoginServlet extends HttpServlet {
@Override
protected void doPost(HttpServletRequest request, HttpServletResponse response) throws ServletException, IOException {
String userName = request.getParameter("userName");
String password = request.getParameter("password");
AdminService adminService = new AdminServiceImpl();
Admin admin = adminService.loginAdmin(userName, password);
if (admin!=null){
ServletContext servletContext = this.getServletContext();
servletContext.setAttribute("user",userName);
CookieTest(request, response);
request.getRequestDispatcher("first.jsp").forward(request,response);
}else {
request.setAttribute("error","用户名或密码不正确");
request.getRequestDispatcher("index.jsp").forward(request,response);
}
}
/**
* 设置首次登录
* */
private void CookieTest(HttpServletRequest request, HttpServletResponse response) throws IOException {
//1.获取所有Cookie
Cookie[] cookies = request.getCookies();
boolean flag = false;//没有cookie为lastTime
//2.遍历cookie数组
if(cookies != null && cookies.length > 0){
for (Cookie cookie : cookies) {
//3.获取cookie的名称
String name = cookie.getName();
//4.判断名称是否是:lastTime
if("lastTime".equals(name)){
//有该Cookie,不是第一次访问
flag = true;//有lastTime的cookie
//设置Cookie的value
//获取当前时间的字符串,重新设置Cookie的值,重新发送cookie
Date date = new Date();
SimpleDateFormat sdf = new SimpleDateFormat("yyyy年MM月dd日 HH:mm:ss");
String str_date = sdf.format(date);
System.out.println("编码前:"+str_date);
//URL编码
str_date = URLEncoder.encode(str_date,"utf-8");
System.out.println("编码后:"+str_date);
cookie.setValue(str_date);
//设置cookie的存活时间
cookie.setMaxAge(60 * 60 * 24 * 30);//一个月
response.addCookie(cookie);
//响应数据
//获取Cookie的value,时间
String value = cookie.getValue();
System.out.println("解码前:"+value);
//URL解码:
value = URLDecoder.decode(value,"utf-8");
System.out.println("解码后:"+value);
ServletContext servletContext = this.getServletContext();
String s="欢迎回来,您上次访问时间为:"+value;
servletContext.setAttribute("accessTime",s);
break;
}
}
}


if(cookies == null || cookies.length == 0 || flag == false){
//没有,第一次访问

//设置Cookie的value
//获取当前时间的字符串,重新设置Cookie的值,重新发送cookie
Date date = new Date();
SimpleDateFormat sdf = new SimpleDateFormat("yyyy年MM月dd日 HH:mm:ss");
String str_date = sdf.format(date);
System.out.println("编码前:"+str_date);
//URL编码
str_date = URLEncoder.encode(str_date,"utf-8");
System.out.println("编码后:"+str_date);

Cookie cookie = new Cookie("lastTime",str_date);
//设置cookie的存活时间
cookie.setMaxAge(60 * 60 * 24 * 30);//一个月
response.addCookie(cookie);
ServletContext servletContext = this.getServletContext();
String s="您好,欢迎您首次访问";
servletContext.setAttribute("accessTime",s);
}
}
@Override
protected void doGet(HttpServletRequest request, HttpServletResponse response) throws ServletException, IOException {
this.doPost(request, response);
}
}

接着更改index.jsp以及first.jsp

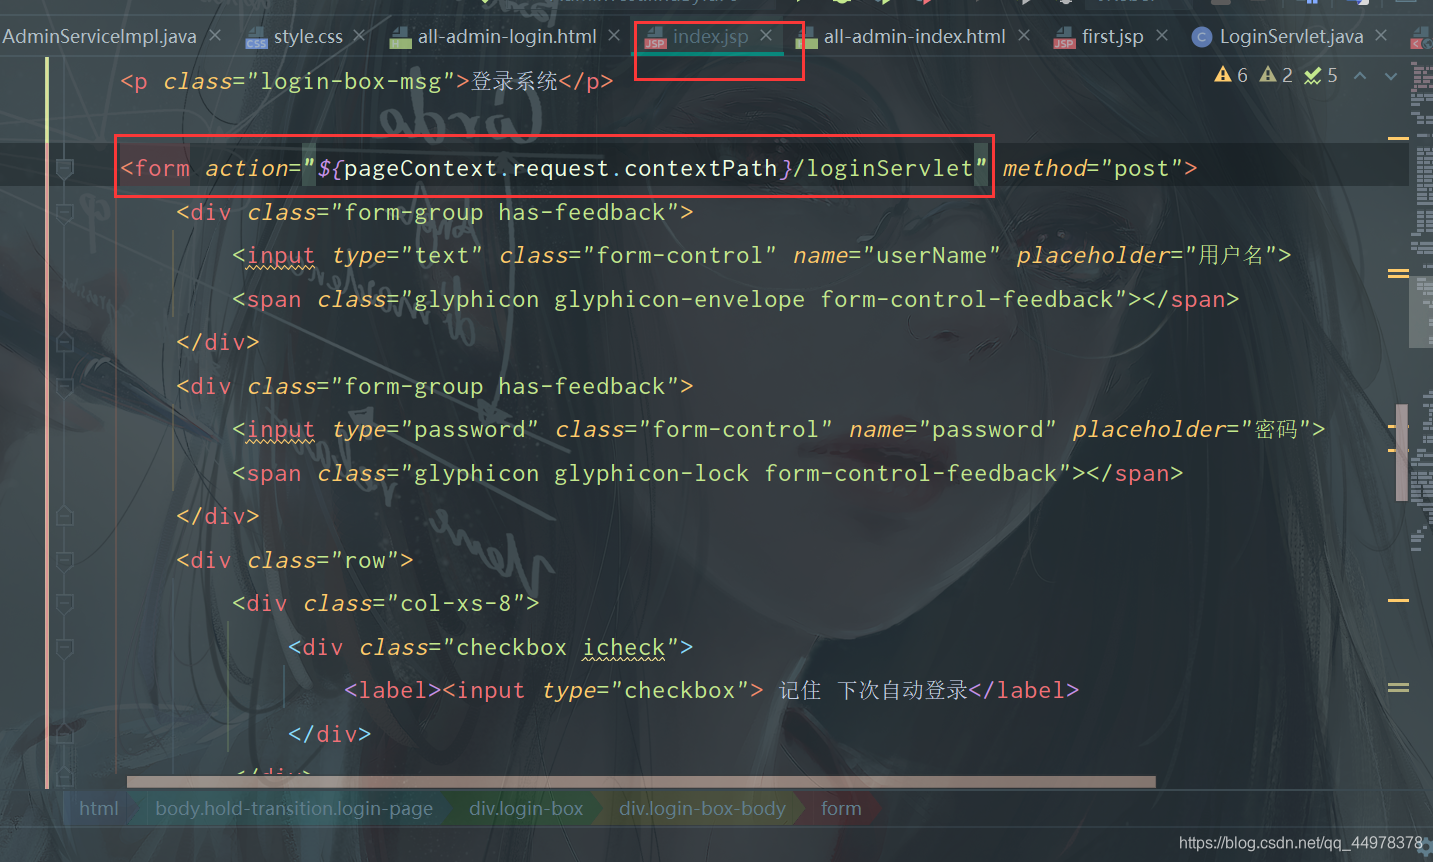
首先更改index.jsp。在index.jsp中有一个表单,我们是要拿到这个表单,把这个表单提交给loginServlet。
在这里插入图片描述

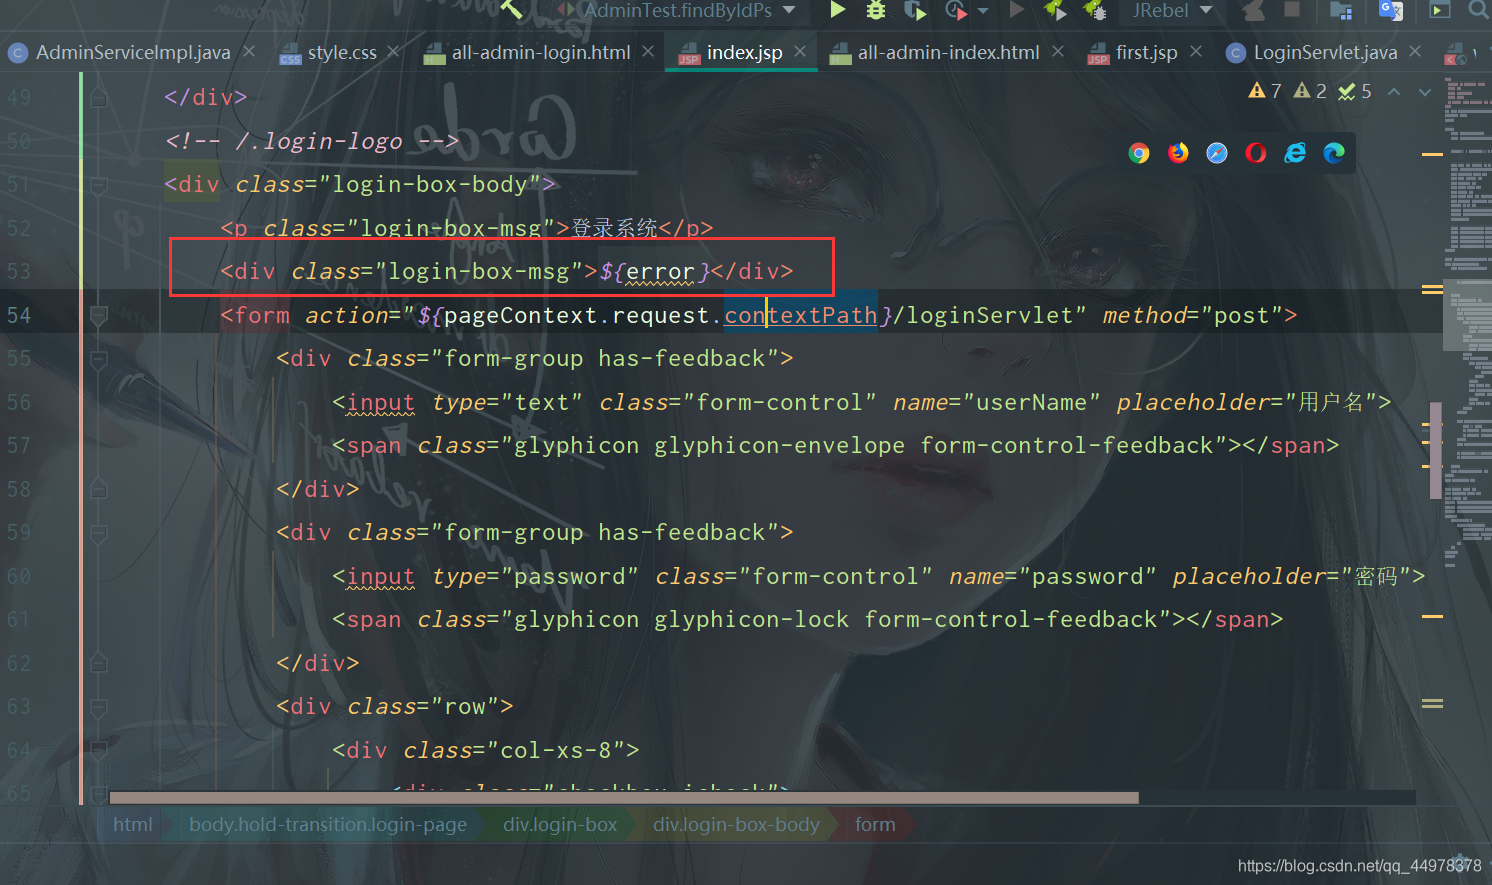
当登录失败

在这个地方添加一个div标签

在这里插入图片描述

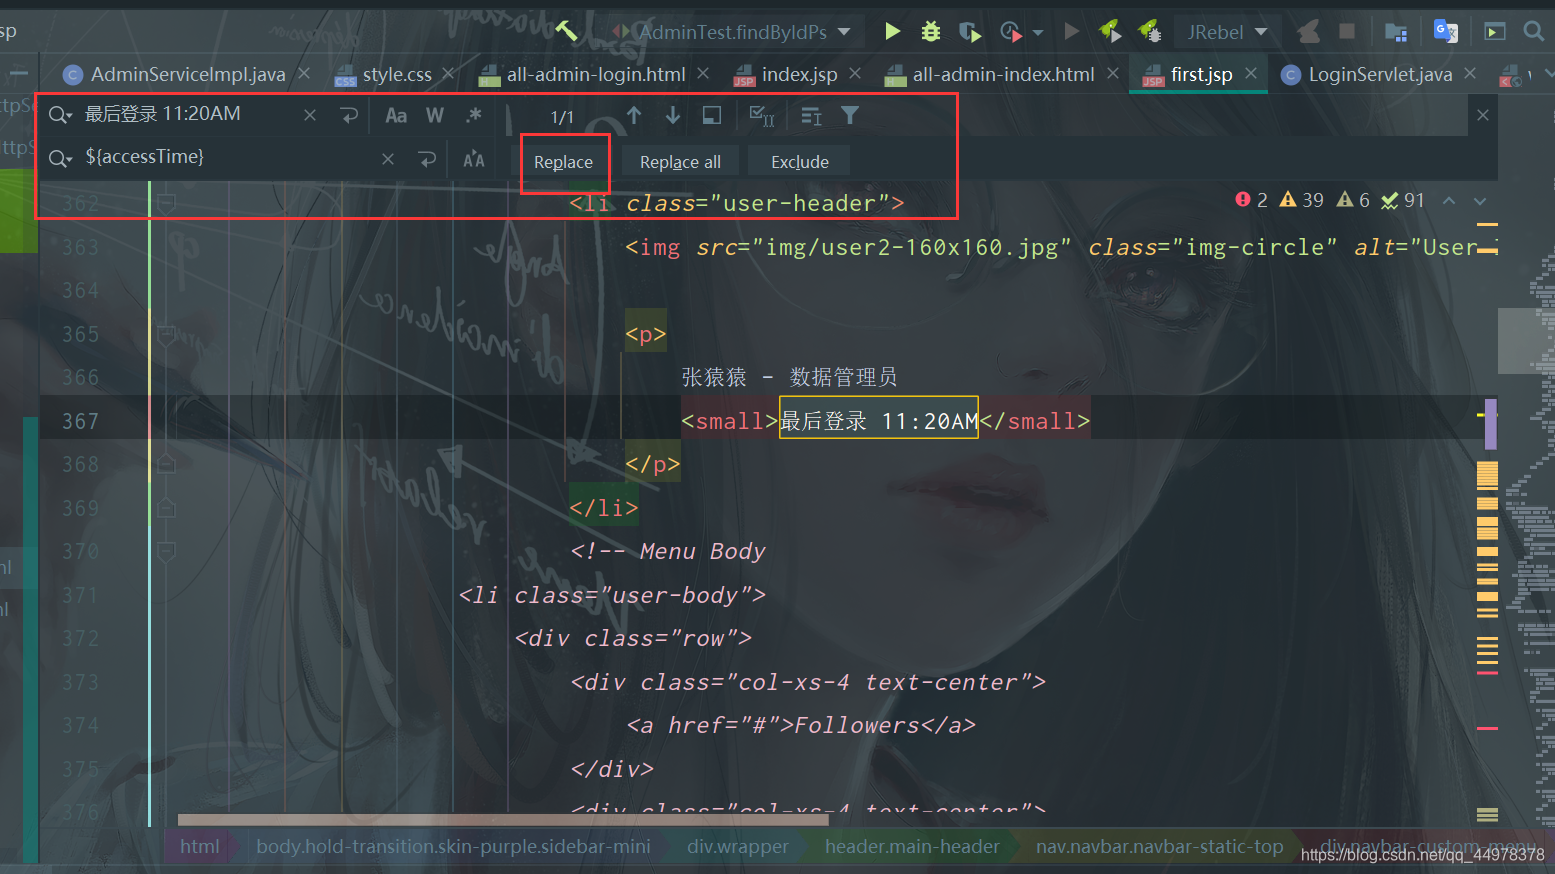
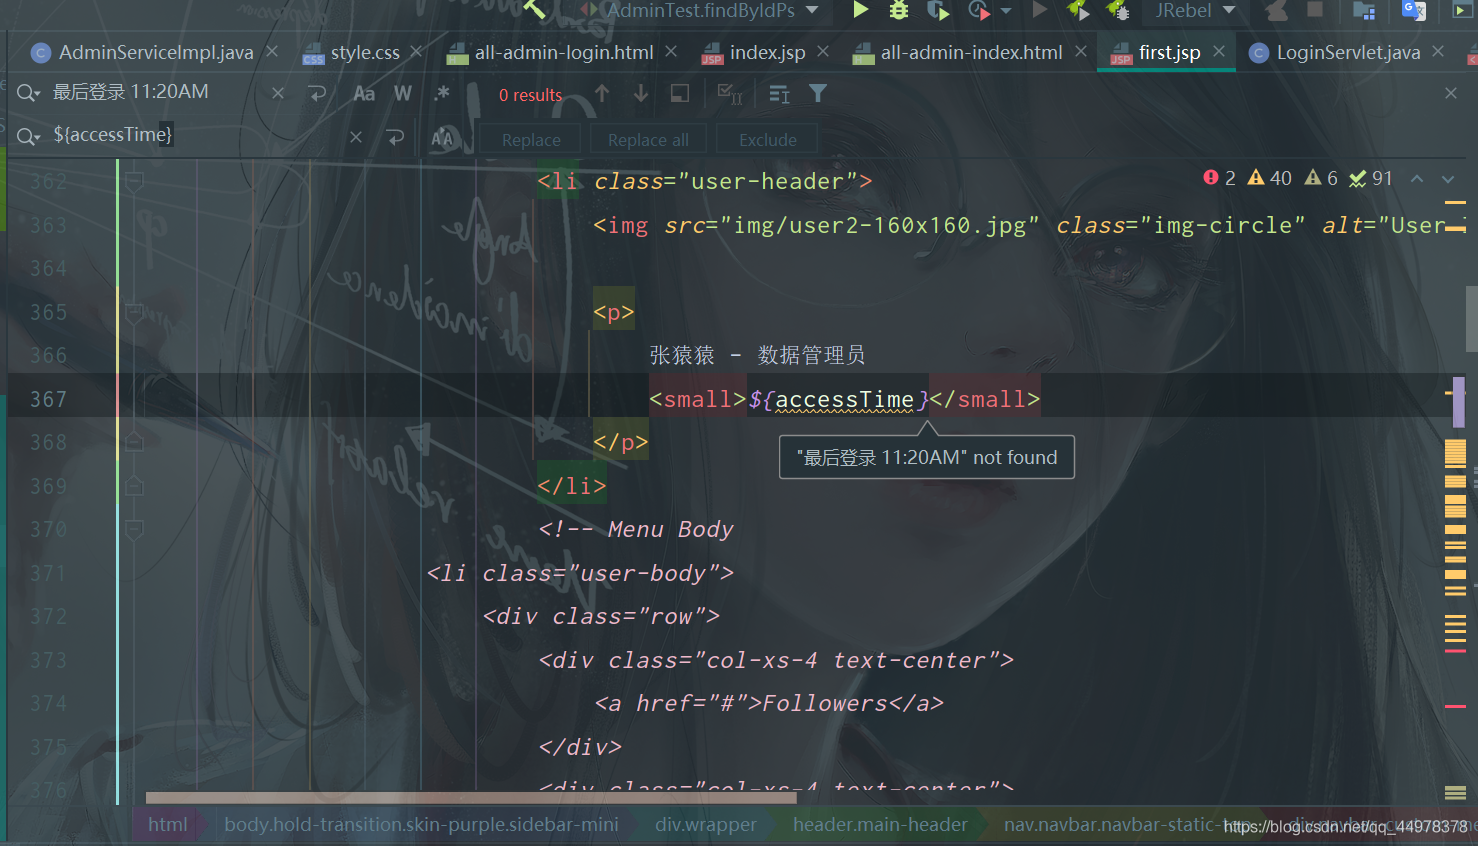
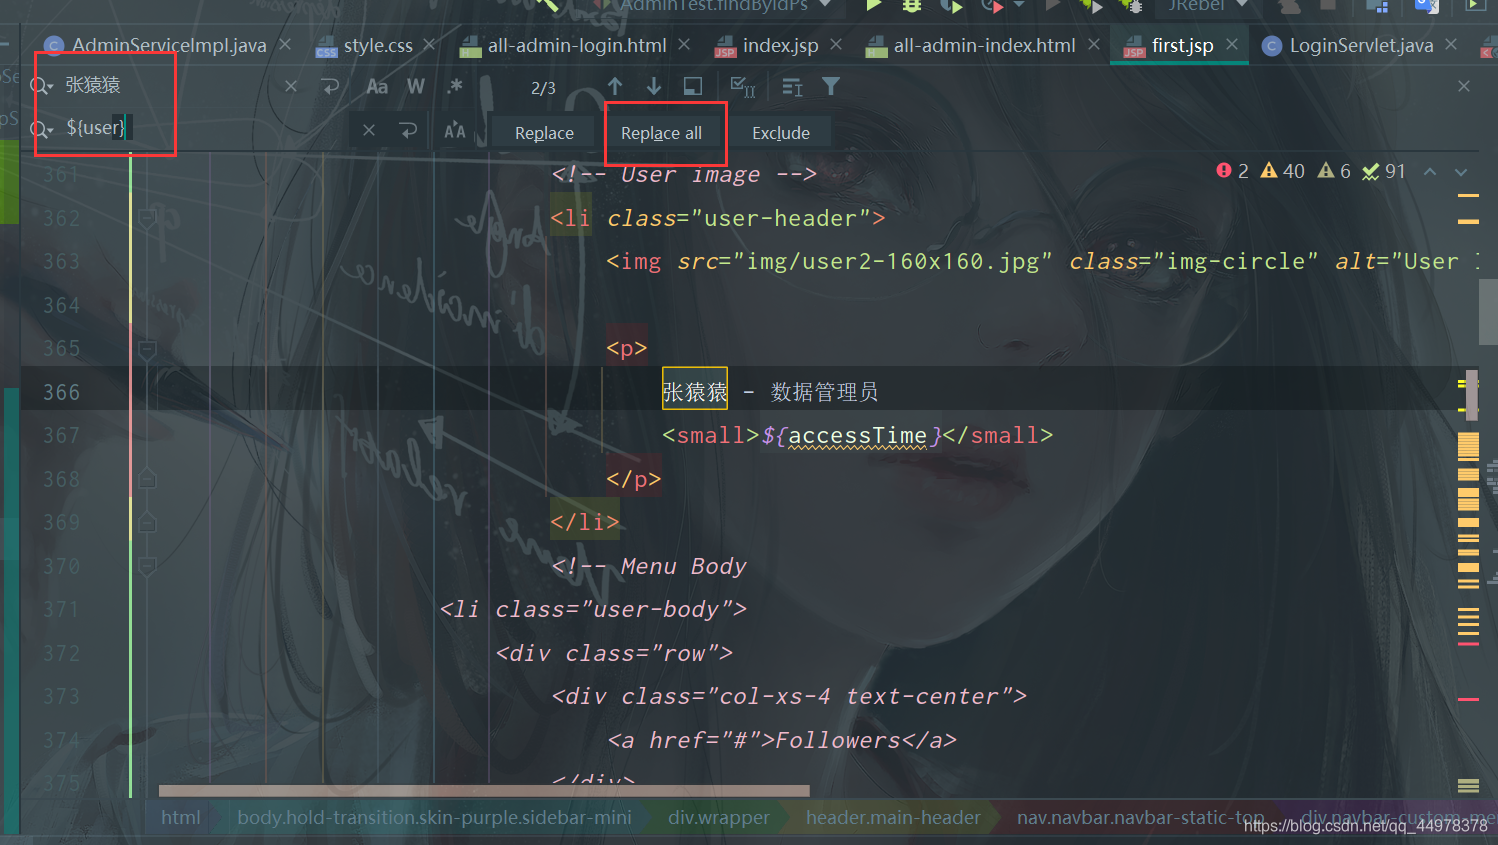
接着更改first.jsp

在这里插入图片描述

在这里插入图片描述

在这里插入图片描述

测试一下登录功能

在这里插入图片描述

如何调通我的1.0项目

先下载下来

链接:https://pan.baidu.com/s/10hT6NamGHohjBUu-OKRv8Q
提取码:t3l5
复制这段内容后打开百度网盘手机App,操作更方便哦

1.导入sql文件

打开你的Navicat(额,不要告诉我你没。。。SQLYong也行。。。再不济,请打开你的命令行…)

image-20201129190118012

创建数据库:

image-20201129190250696

image-20201129190440547

image-20201129190837417

image-20201129190625676

image-20201129190644416

image-20201129190656563

image-20201129190714187

image-20201129190810686

先关闭这个数据库,重新连接就可以发现,这个数据库已经多了三张表。

image-20201129190920820

2.使用IDEA打开项目

第一步:打开IDEA

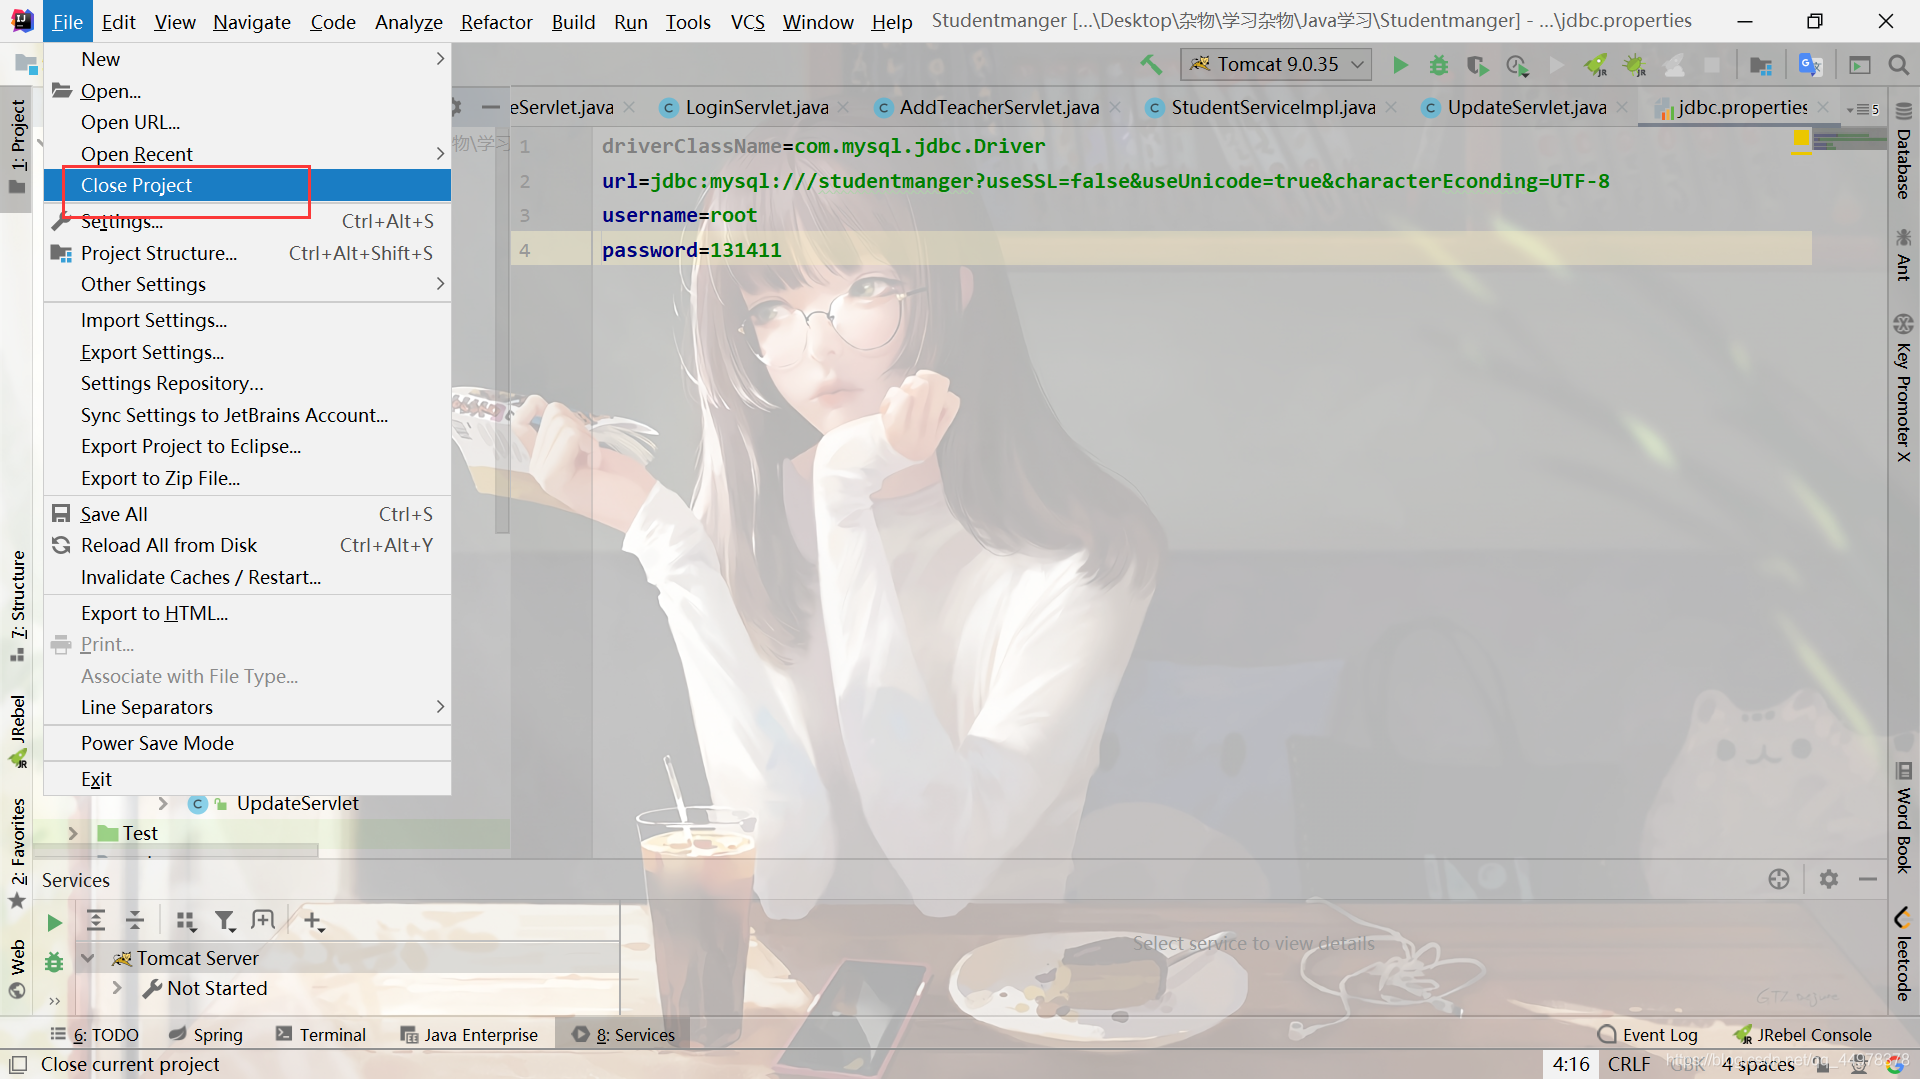
若有人是这个样子,先关闭这个项目
在这里插入图片描述

版本可能不一样,open的位置也不一样

image-20201129191235507

找到解压的那个项目:

image-20201129191612011

进去之后就是这样

在这里插入图片描述

当然哦~有可能有人会报错哦。是全部都爆红的那种,哈哈,看看类是否爆红。爆红是由于没有一样的环境。

如果你的类都爆红,请看:

image-20201129191911300

选择JDK版本

image-20201129191944370

3.更改数据库

1.如果你的数据库是5.几的,那么,代码你就不需要更改,只需要把密码给改掉即可。

image-20201129200341099

2.如果你的数据库是8.几的,那么,你就需要更改很多东西了哦。

一:下载8.几的mysql连接驱动jar包

链接:https://pan.baidu.com/s/1N1ruCcWGECB8w6mbQtlFYw
提取码:7csg
复制这段内容后打开百度网盘手机App,操作更方便哦

把这个jar包复制到lib目录下

image-20201129200716799

然后重新Add as Library

image-20201129200939427

二:更改jdbc.properties文件

1
driverClassName=com.mysql.cj.jdbc.Driver

三:更改成你的密码即可

四:用Tomcat跑一下试试吧~

跑不通请留言。。。。我可以帮你看看

目前本人项目基本实现的功能截图

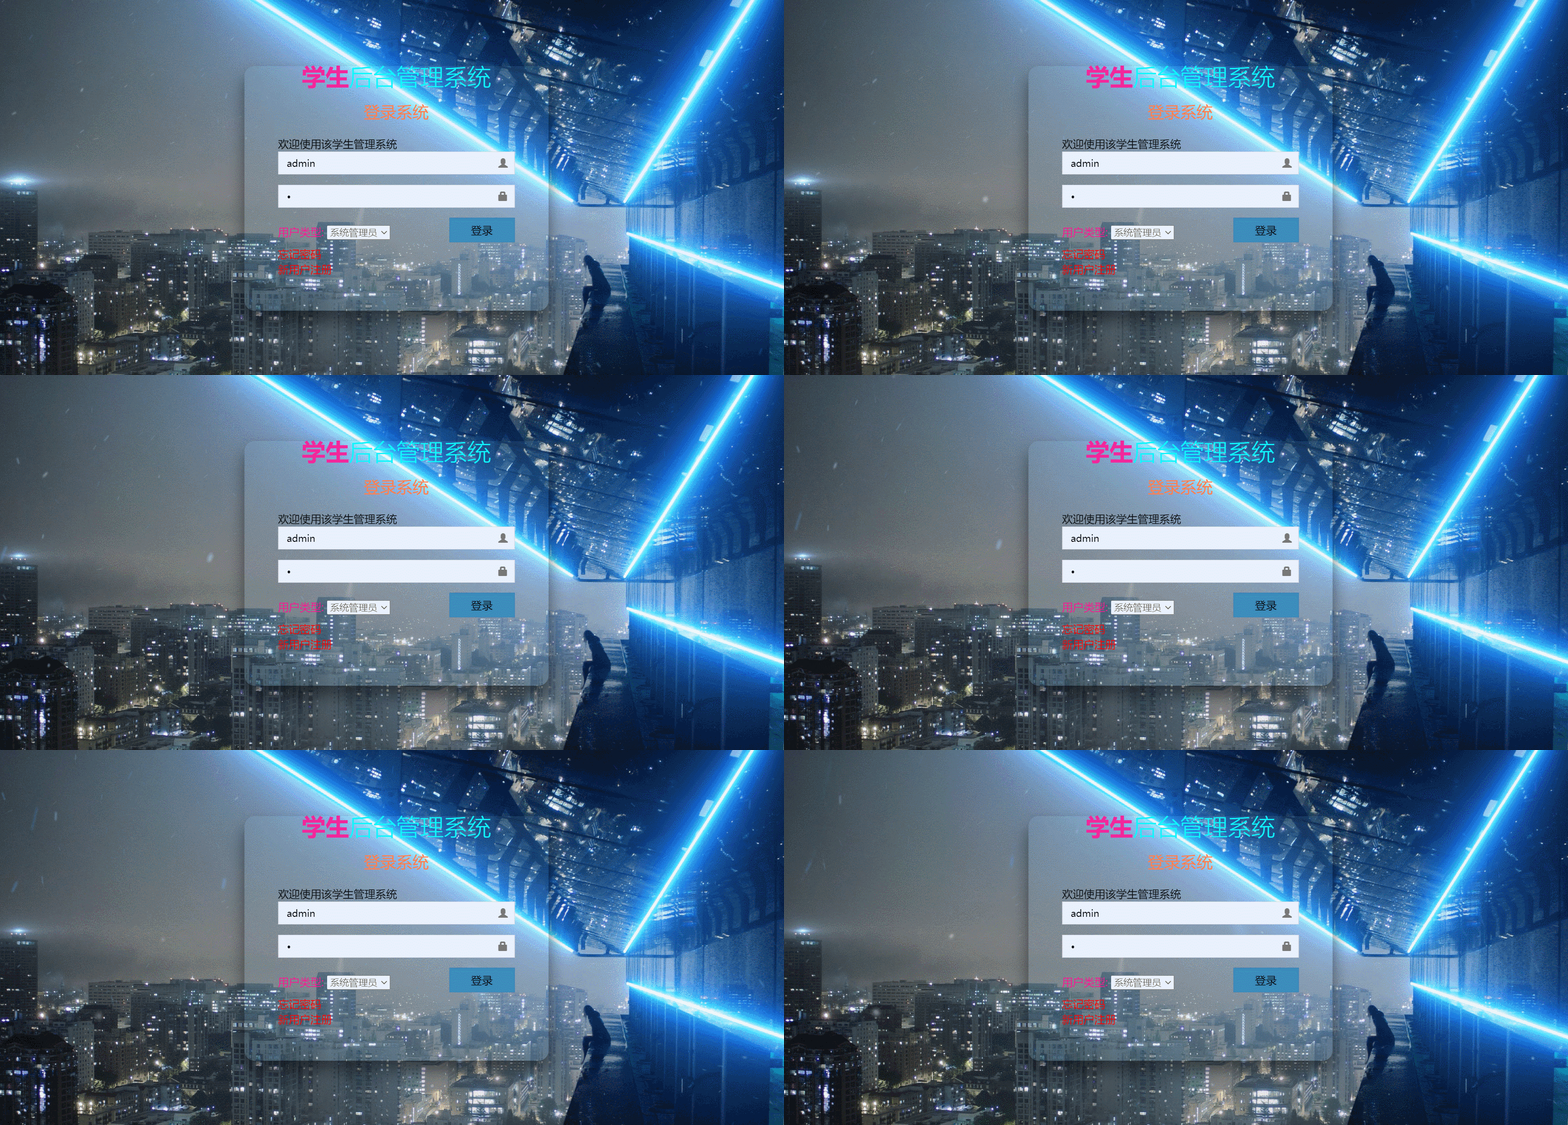
1.登录功能
在这里插入图片描述

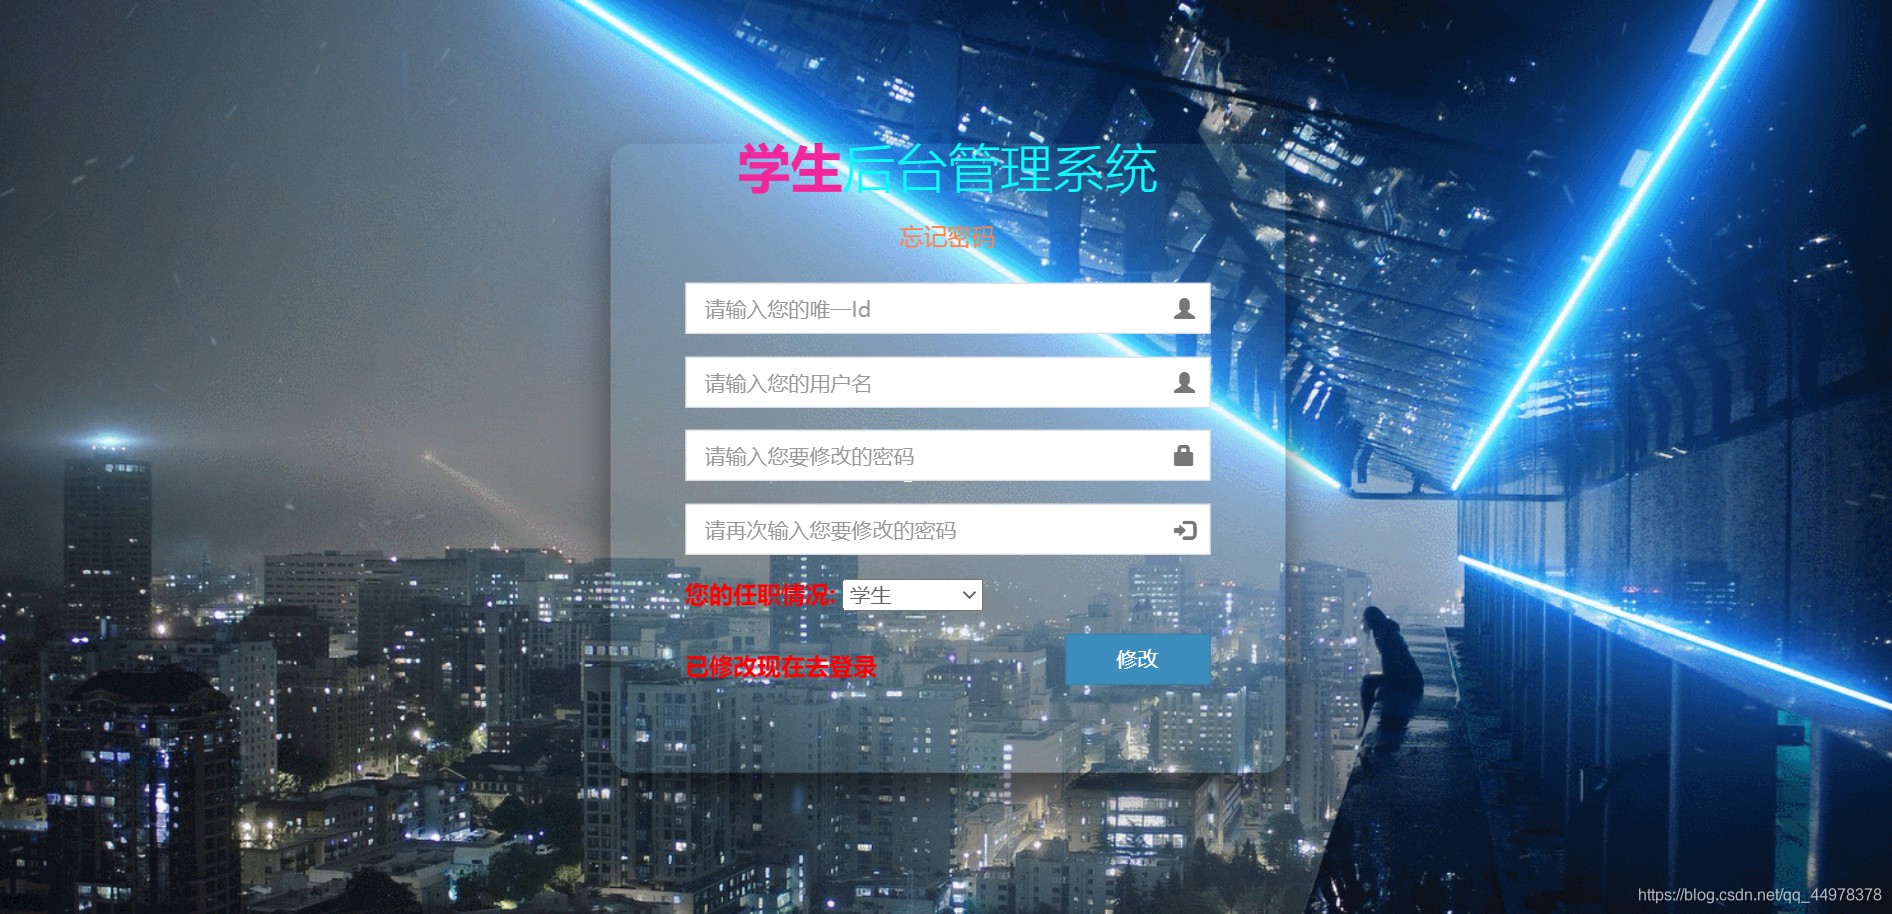
2.忘记密码界面

在这里插入图片描述

3.注册页面

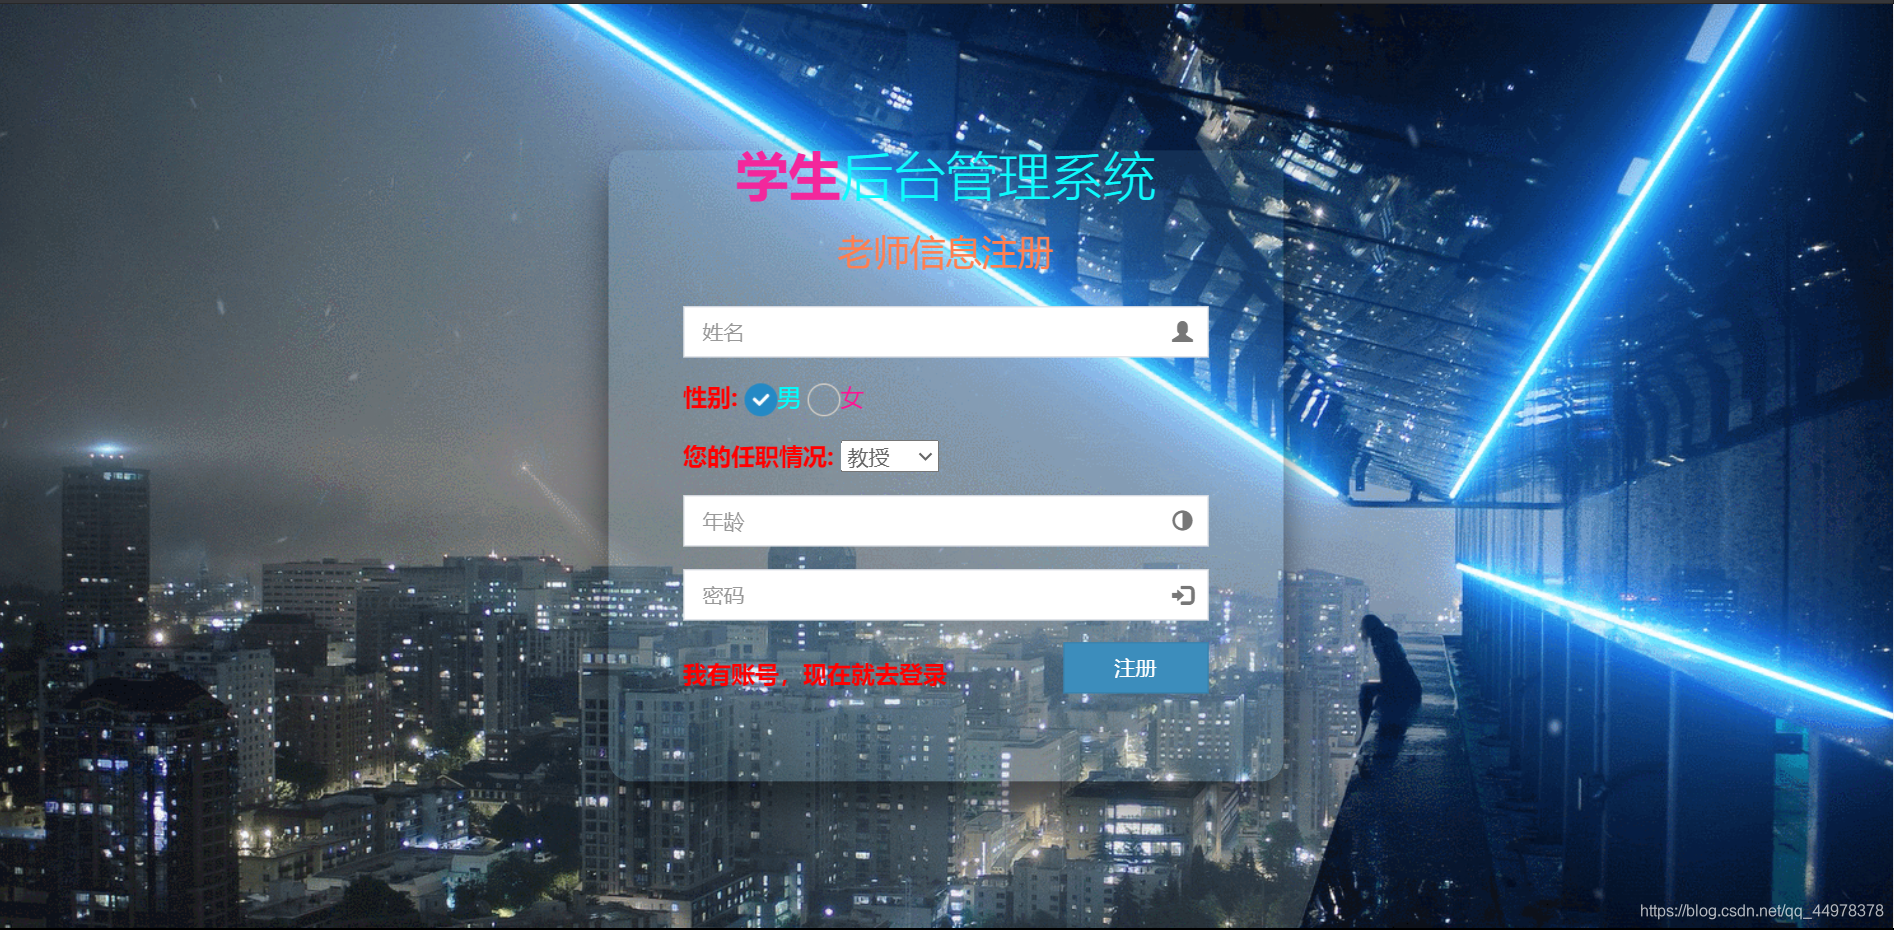
在这里插入图片描述

4.首界面

系统管理员、老师首界面

image-20201129203317395

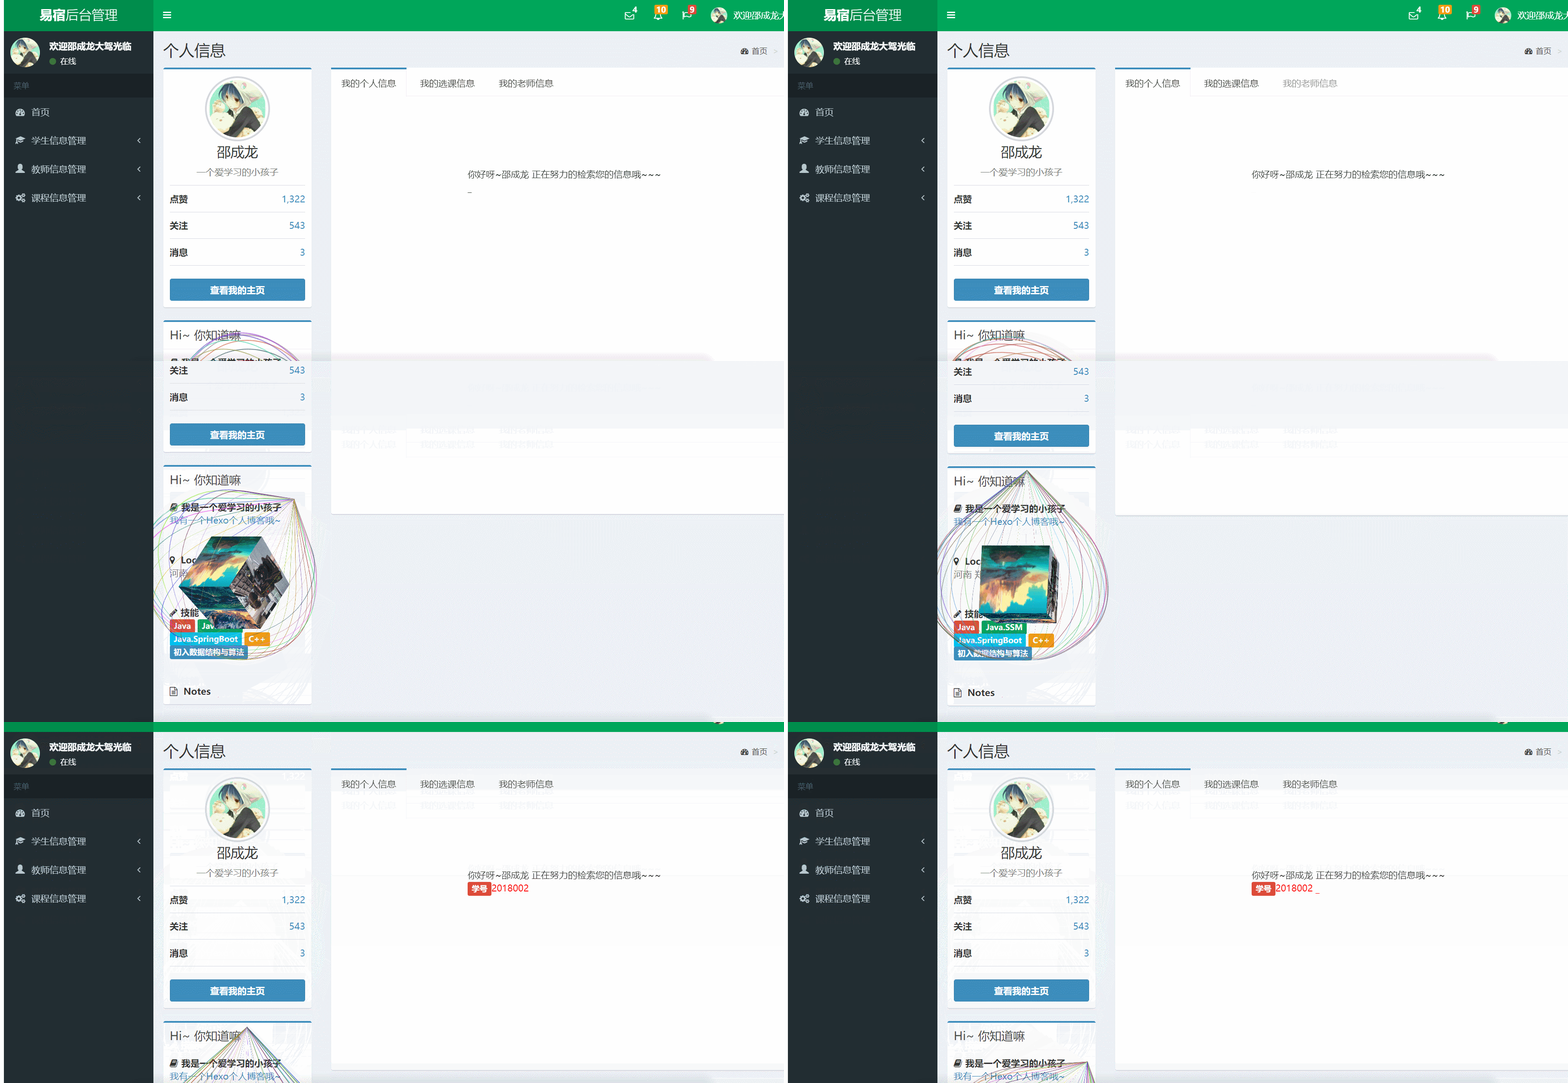
学生登录界面

在这里插入图片描述

记录登录者,以及登录时间

image-20201129212344959

5.学生信息管理界面

image-20201129204027176

信息更改界面

image-20201129204059447

学生信息添加界面

image-20201129204126021

模糊查询

image-20201129212305497

6.教师信息界面

image-20201129204535541

image-20201129211936061

image-20201129211956354

7.课程管理

实现的是多表查询

image-20201129212124113

image-20201129212036800

image-20201129212202672

8.学生选课

image-20201129212230356

9.报错页面

image-20201129212738499

最后版本

采用的是Maven管理工具:

调通方式和1.0版本调通方式几乎一样:

百度网盘链接如下:

链接:https://pan.baidu.com/s/1bllWAxO_7yv0-fwIJQt_Wg
提取码:v5dv
复制这段内容后打开百度网盘手机App,操作更方便哦

还有一些是和老师项目要求无关的项目:

链接:https://pan.baidu.com/s/1EmylEuPAbCCZun_d4K7OTw
提取码:sqm1
复制这段内容后打开百度网盘手机App,操作更方便哦

点击查看
-------------------本文结束 感谢您的阅读-------------------